Friday 30 December 2011

American Girl Cape

Black Cape for American Girl Doll....Hope you like it Cayle....


Burgandy Cape ~ You can see by this picture that I figured out the hood pattern..... A small change was needed...A knit row needed to be a purl row in 0rder to get the two bars as pictured.... The other hoods had 3 rows of bars....


This is the same cape pattern but I crocheted Boa around the edges as well as the bars on the cape..... I wanted it to look like a Winter Wonderland.....Hope you like it Cayle......


Here is the American Girl Cape for dgd's AG dolls..... I have a red one made & plan to make a couple more..... I used Boa instead of fun fur & crocheted two rounds on the cape....

Thanks goes to Michelle for all the help.... I am still working on getting the hood right.... Hope you like it Cayle....

Here is the link to this free pattern

http://www.abc-knitting-patterns.com/1143.html

Monday 19 December 2011

Harry Potter Scarves for Christmas


2 Harry Potter Scarves for Christmas

These are Harry Potter Scarves  that dd asked me to make for the babysitter's children....The pattern is in my head... They are best of friends of dgs Aidan....I loved making them but must get onto American Girl Doll knitting for dgd....
 

Tuesday 6 December 2011

How To Block Your Cloth or Bookmark

Letters really need to be blocked well as they will show so much better....

Place cloth or bookmark on table & generously spray with water.... Take a tea towel & place your hands all over the cloth to flatten it out so it lays nice & even; then spray with water again......Let the water soak in for about 20 minutes... I now use the handle end of a wooden spoon....... & press down all around the  letters & surrounding area of the cloth...Using the end of a knitting needle(this is your fine tuning) I then press around the letters & inside the letters till the areas around the letters are quite flat...This makes the letters pop.... I move it to where I am going to take the picture & flatten some more just around the letters... Let the cloth dry overnight as this makes the cloth look better too.... The yarn relaxes & the cloth will pop even more.... hope this helps....& don't be afraid to spend time doing this as the efforts are well worth it......

Your cloth or bookmark will look so much nicer for presenting...

Tuesday 29 November 2011

Prim Candy Canes


  I bought some prim prints  for my Prim projects....At the Dollar Store I bought some plastic candy canes, about six ~ seven inches long, with  candy inside.... This plastic is tough & holds up really well to a glue gun.  The secret here to a good looking candy cane is to take one long continous piece of material about 1 1/2 in. wide...  I like to rip the material to get the thready & primitive look.....Wrap it around on a slant & glue every once in awhile with a hot glue gun.   The glue doesn't show through the material.   Cover entire candy cane.... I took another prim print & made a contrasting bow....Very quick & very easy.....

Monday 28 November 2011

Prim Christmas Tree


I bought a styrofoam Christmas tree about 8  1/2 in. tall.....

 I took some material & ripped it into 2 inch strips.... The bottom two rows were about 1 1/2 in strips...  I wound the material around the part of the tree that I wanted to cover three times(3x) for a full ruffle....I cut this length of material off & I sewed by hand a basting stitch through the top of the material.....I gathered to bunch it up to look like a ruffle..... I attached with pins around the tree, making sure my ruffle was evenly distributed.... If you want more of a ruffle wrap 4 times or if you want less of a ruffle, wrap 2 times...

I like the primitive effect so I like the rough edges & the strings from the material
just add to the charm....

Tuesday 15 November 2011

Flameless Candle Snowman, Snowman Canning Jar 2011


Flameless Snowman Candle

©Copyright protected Marilyn Wallace 2010
Materials Needed Canning jar
small White anklet socks
Tea Lights
Glue gun with Hot glue sticks
Fake snow Decorations for small top hat
Black Bristol board

INSTRUCTIONS I used a small canning jar. Remove lid. Place a while anklet over the bottom of the jar....Tuck open end of sock inside jar...This is just a small amount... I bought mine in Walmart. Paint on eyes, nose & mouth..... or google pic of snowman & cut out & glue on eyes & nose.... I used end of brush & dipped into black, acrylic paint & put dots on for mouth..... Flameless Snowman Candle/pg2 For Hat: Use Black Bristol Board Cut a strip 9 7/8” x 1 5/8” wide.....Hot glue this around the jar lid making pleats as you go to gather it in.... Cut the top which is a 3 “ circle & hot glue to top of ring.... You do not use the lid..... Cut out the brim of the hat.... which is a 5” circle.... Cut the centre hole 2 7/8 “.... I used a Martha Stewart Circle Cutter & my circles were perfect....I found it easier to cut the middle circle first. Place tealight inside jar .... Place brim over the ridges of the canning jar....then place the top hat on the jar If you wish cut a little x in the top hat....& place tealight flame inside this... It doesn’t need to be glued.... The little top hat can be removed carefully, as it is not glued, to turn off & on the tealights.... Decorate the top hat as you wish.... I used fake snow in a jar, ribbon & snowflakes using my Martha Stewart Punch...... Looks nice in daytime or at night......


Here is my craft for the grands this year... I used a canning jar & decoupauged pale blue tissue paper on it to make the background.....I cut out Snowmen tissue paper & decoupaged to the front..... I glued one Snowman over top  another Snowman so the Snowman would show better....Make sure you line up or you will have 4 eyes...

I placed a tealight inside the jar & also glued one to the inside of the lid so it would shine downwards to light the jar better....Drill a small hole ~ just enough room to expose the on/off switch at the top of the jar cap..... ...  I cut a 5 1/2 in circle from material & placed the cap over top....Cut a small opening in the material with scissor to expose switch...  I hot glued the material to the cap & glued the cap with material into ring... I cut a short piece of material to wrap around the top of the jar....When I tied the material around, I inserted a piece of cinnamon, breaking it in half for the aroma to escape..

I like placing my Snowman Canning Jar in a window in the daytime as the light shines through it making it look like stained glass.....The colours just pop....whereas at night they have a muted tone....

Friday 21 October 2011

Phat 1/4's Art


I needed some art in our bedroom at the lake.....I bought some painter's canvas that has a wooden frame... I bought 3 different colours of phat quarters & stapled them to the back.....For different seasons purchase appropriate scenes & change them up at different times of the year....We are not there in winter but I think snowmen would be so cute..... Next year I will get some Halloween material....Very inexpensive....

Monday 17 October 2011

Pumpkins Made for the Grandchildren


Happy  Halloween  2011

(original idea was seen at Martha Stewart)

Bought my pumpkins at Walmart already carved out & with light in it.....

 Bought 2 large bottles of Martha Stewart glitter....I  took my 40% off coupon
from Michaels & dh with me so he could get the other glitter bottle discounted(other wise he would not go in store)


 Bought a large bottle of glitter in orange & gold

  
This pumpkin is made using the orange...

Mod podge the pumpkin in sections & then add glitter until all of the
pumpkin is covered....

Pumpkin will glitter in the sun 


Place inside or outside (should hold up in the rain as I covered the pumkin with a clear sealer)


Thursday 13 October 2011

Trick or Tweet


Trick or Tweet©
Designed by Marilyn Wallace Sept. 15,   2011
Materials:
  4 mm short, circular needles (16 inches)(knit  straight on them) or US#6
  1 ball cotton yarn for  a Dish Cloth or
  1 ball CottonTots for a soft,  Spa Cloth

Special Instructions:
B5 means to do border  for 5 stitches (always keep the seed st. sequence)
How to do seed st. on odd number of stitches & even number of st.
Cast on 47  st.
Row 01 seed st.  across row
Row 02 seed st.  across  row
Row 03 seed st.  across row
Row 04 seed st.  across row
Row 05 seed st.  across row
Row 06 B5 k37 B5
Row 07 B5 p37 B5
Row 08 B5 k37 B5
Row 09 B5 p3 k2 p3 k3 p3 k3 p1 k5 p1 k5 p3 k2 p3 B5
Row 10 B5 k37 B5
Row 11 B5 p3 k2 p3 k4 p1 k4 p1 k5 p1 k5 p3 k2 p3 B5
Row 12 B5 k37 B5
Row 13 B5 p3 k2 p3 k2 p1 k3 p1 k2 p1 k2 p4 k2 p6 k2 p3 B5
Row 14 B5 k37 B5
Row 15 B5 p3 k2 p3 k2 p1 k3 p1 k2 p1 k2 p4 k2 p6 k2 p3 B5
Row 16 B5 k37 B5
Row 17 B5 p3 k2 p3 k2 p1 k3 p1 k2 p1 k5 p1 k5 p3 k2 p3 B5
Row 18 B5 k37 B5
Row 19 B5 p3 k2 p3 k2 p5 k2 p1 k2 p4 k2 p6 k2 p3 B5
Row 20 B5 k37 B5
Row 21 B5 p3 k2 p3 k2 p5 k2 p1 k2 p4 k2 p6 k2 p3 B5
Row 22 B5 k37 B5
Row 23 B5 p1 k6 p1 k2 p5 k2 p1 k5 p1 k5 p1 k6 p1 B5
Row 24 B5 k37 B5
Row 25 B5 p1 k6 p1 k2 p5 k2 p1 k5 p1 k5 p1 k6 p1 B5
Row 26 B5 k37 B5
Row 27 B5 p37 B5
Row 28 B5 k37 B5
Row 29 B5 p13 k4 p3 k2 p1 k2 p12 B5
Row 30 B5 k37 B5
Row 31 B5 p12 k2 p2 k2 p2 k4 p13 B5
Row 32 B5 k37 B5
Row 33 B5 p12 k2 p2 k2 p2 k2 p1 k2 p12 B5
Row 34 B5 k37 B5
Row 35 B5 p13 k4 p4 k3 p13 B5
Row 36 B5 k37 B5
Row 37 B5 p37 B5
Row 38 B5 k37 B5
Row 39 B5 p6 k2 p3 k2 p1 k2 p1 k2 p2 k3 p2 k2 p3 k2 p4 B5
Row 40 B5 k37 B5
Row 41 B5 p6 k2 p3 k2 p1 k2 p1 k2 p1 k5 p1 k2 p3 k2 p4 B5
Row 42 B5 k37 B5
Row 43 B5 p6 k2 p3 k2 p1 k2 p1 k2 p1 k2 p1 k2 p1 k2 p2 k2 p5 B5
Row 44 B5 k37 B5
Row 45 B5 p6 k2 p3 k2 p1 k2 p1 k2 p1 k2 p4 k2 p1 k2 p6 B5
Row 46 B5 k37 B5
Row 47 B5 p6 k2 p3 k4 p2 k2 p1 k2 p4 k4 p7 B5
Row 48 B5 k37 B5
Row 49 B5 p6 k2 p3 k2 p1 k2 p1 k2 p1 k2 p4 k2 p1 k2 p6 B5
Row 50 B5 k37 B5
Row 51 B5 p6 k2 p3 k2 p1 k2 p1 k2 p1 k2 p1 k2 p1 k2 p2 k2 p5 B5
Row 52 B5 k37 B5
Row 53 B5 p4 k6 p1 k5 p1 k2 p1 k5 p1 k2 p3 k2 p4 B5
Row 54 B5 k37 B5
Row 55 p4 k6 p1 k4 p2 k2 p2 k3 p2 k2 p3 k2 p4 B5
Row 56 k37 B5
Row 57 p37 B5
Row 58 k37 B5
Row 59 seed st. across row
Row 60 seed st. across row
Row 61 seed st. across row
Row 62 seed st. across row
Row 63 seed st. across row
Row 64 Cast off…..


Sunday 8 May 2011

Pillow made by Granddaughter Cayle for Mother's Day


Thank you so much, Cayle, for the beautiful pillow you made for me.... It will always be a very special pillow...For a girl who is just 12 years old your talent for sewing is shining through.... Thank you

xx 00 Love Grandma

Tuesday 19 April 2011

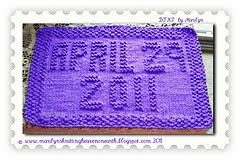
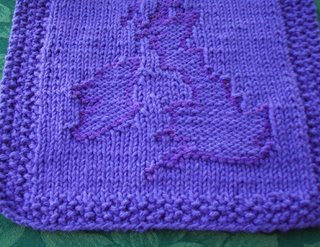
Introducing The Royals~April 29 2011, William & Kate, British Isles

(William & Kate's Wedding Day)


William and Kate


Dish/Wash cloth British Isles©
Designed by Marilyn Wallace
April 2, 2006

4mm needle
I use cotton worsted weight for dish/wash cloths
I use acrylic worsted weight for afghan squares
B5 means Border 5 in seed stitch keep in the seed stitch sequence

How to do seed st. on odd number of stitches & even number of st.
http://knitting.about.com/od/stitchglossary/g/seedstitch.htm

Cast On 42 stitches
Row 01 seed st. across row
Row 02 seed st. across row
Row 03 seed st. across row
Row 04 seed st. across row
Row 05 seed st. across row
Row 06 B5 k32 B5
Row 07 B5 p32 B5
Row 08 B5 k32 B5
Row 09 B5 p13 k1 p18 B5
Row 10 B5 k18 p1 k13 B5
Row 11 B5 p14 k3 p15 B5
Row 12 B5 k15 p2 k15 B5
Row 13 B5 p15 k11 p6 B5
Row 14 B5 k5 p11 k16 B5
Row 15 B5 p19 k9 p4 B5
Row 16 B5 k5 p8 k1 p1 k11 p1 k5 B5
Row 17 B5 p4 k4 p6 k1 p1 k11 p5 B5
Row 18 B5 k4 p14 k5 p5 k4 B5
Row 19 B5 p3 k7 p5 k13 p4 B5
Row 20 B5 k4 p12 k4 p7 k5 B5
Row 21 B5 p5 k7 p4 k12 p4 B5
Row 22 B5 k4 p12 k4 p7 k5 B5
Row 23 B5 p6 k7 p2 k10 p1 k2 p4 B5
Row 24 B5 k7 p9 k3 p6 k7 B5
Row 25 B5 p5 k7 p3 k1 p3 k6 p7 B5
Row 26 B5 k7 p6 k7 p8 k4 B5
Row 27 B5 p5 k7 p7 k5 p8 B5
Row 28 B5 k8 p5 k7 p8 k4 B5
Row 29 B5 p5 k8 p6 k5 p8 B5
Row 30 B5 k8 p6 k5 p6 k7 B5
Row 31 B5 p8 k6 p4 k5 p9 B5
Row 32 B5 k10 p4 k5 p6 k7 B5
Row 33 B5 p8 k5 p2 k7 p10 B5
Row 34 B5 k11 p6 k2 p2 k1 p1 k9 B5
Row 35 B5 p15 k6 p11 B5
Row 36 B5 k11 p5 k16 B5
Row 37 B5 p12 k1 p2 k6 p11 B5
Row 38 B5 k14 p4 k1 p1 k12 B5
Row 39 B5 p14 k5 p13 B5
Row 40 B5 k13 p5 k1 p1 k12 B5
Row 41 B5 p12 k2 p1 k5 p12 B5
Row 42 B5 k12 p7 k13 B5
Row 43 B5 p14 k6 p12 B5
Row 44 B5 k11 p9 k1 p1 k10 B5
Row 45 B5 p10 k1 p1 k1 p1 k7 p11 B5
Row 46 B5 k11 p3 k1 p3 k2 p2 k10 B5
Row 47 B5 p11 k1 p2 k3 p15 B5
Row 48 B5 k15 p2 k2 p2 k11 B5
Row 49 B5 p11 k2 p2 k4 p13 B5
Row 50 B5 k13 p4 k2 p1 k12 B5
Row 51 B5 p32 B5Row 52 B5 k32 B5
Row 53 B5 p32 B5
Row 54 seed st. across row
Row 55 seed st. across row
Row 56 seed st. across row
Row 57 seed st. across row
Row 58 seed st. across row

Row 59 CO

Friday 1 April 2011

Knitting Pics

That would be me....


Knitting at it's finest.....